Let's make it
Instructions.
- 1
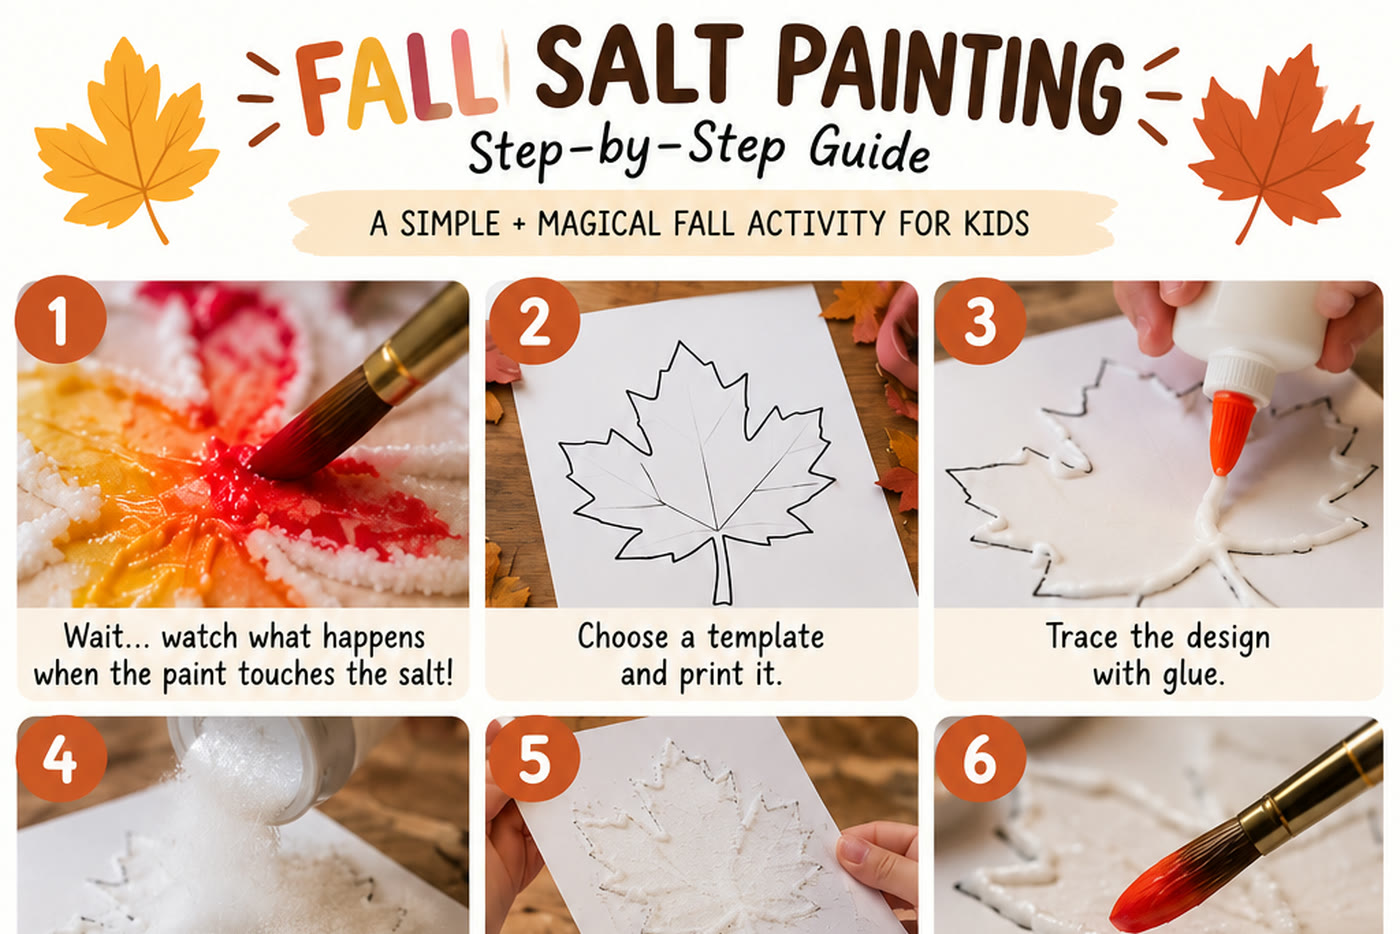
Choose a fall design and print it on cardstock or heavier paper so it holds up to the glue, salt, and watercolor.
- 2
Place the paper on a tray or baking sheet, then slowly squeeze school glue over the black lines. Keep the glue lines thick enough for the salt to stick.
- 3
Pour salt generously over the entire design until all of the glue is completely covered.
- 4
Gently lift the paper and shake the extra salt back onto the tray, leaving raised salt lines over the design.
- 5
Load a paintbrush with plenty of watercolor and lightly touch it to the salt. Dab instead of brushing back and forth, then watch the color travel through the raised lines.
- 6
Continue adding colors to different parts of the design, experimenting with traditional fall shades or any color combination you like.
- 7
Place the finished artwork somewhere flat and let it dry completely. Some loose salt may fall off after it dries, which is normal.
Safety tip
- Use with adult supervision. Choose the brush or dropper and all other materials based on your child's age and abilities, and do not allow children to eat the glue, salt, paint, or finished project.
Field Notes
- Parent tip: Use more salt than you think you need so the glue is fully covered, and keep the watercolor fairly wet so the color spreads easily.
- Parent tip: Let kids use classic oranges, reds, yellows, and browns or go off-script with a rainbow pumpkin, blue maple leaf, or multicolored acorn.
- Parent tip: Swap the paintbrush for a dropper to change the fine motor challenge.
- Setup takes about 5 minutes. Through play, this activity supports fine motor control, hand-eye coordination, visual-motor skills, precision, creativity, sensory exploration, and cause-and-effect learning.